Sunday, December 31, 2006

Saturday Progress

Today we glued the bottom onto boat number two and started sealing the inside of boat one with epoxy. First we made large fillets around the bulkheads with thickened epoxy and then we laid the boat on its side so that we could work on the inside side panel easily.


We got two coats of epoxy on the inside panel and decided to call it a night and get an early start tomorrow morning.

Saturday, December 30, 2006

Nice Bottom!

Today we got started by planing down the chines so that the bottom will sit flush on the bulkheads and the side panels. Then we glued on the transom and trimmed the bottom panel to the rough shape of the bottom. We glued on the bottom panel and held it down tight with screws. The crossbraces seen across the top of the hull held the sides very rigid and straight and were assembled with all the parts dry so that when we put epoxy on everything and reassembled, everything would still line up perfectly.

Next we started squaring up the second hull for assembly following the same procedure as the first boat. By the end of the day we had the second boat all glued up and curing so that tomorrow we could glue the bottom on the second boat and begin applying fiberglass tape to the inside of the first hull.


We also started shaping the amas to the rough side view shape. Lots more work to do on the amas. Don't forget to see the time lapse video from thursday.

A Big Square Boat

On Thursday we showed up at the shop and decided that we should scarf and glue the tops and bottom plywood sections. To do this we ripped six plywood sheets down to a smaller size and then we pulled out the scarfing jig to cut the shallow angle. After arranging the sheets for each boat we took them inside to start the epoxy gluing. All of this was straight forward after having done this for all of the side panels.

Once everything was curing on the tops and bottoms, finalizing work started on bulkheads for boat 1. This was one of the most frustrating parts of the build because we had to make sure that the whole boat was more or less in a straight line. We eventually solved the problem by adding diagonal cross braces for each section of the hull. At the end of the day boat 1 was curing with the bulkheads and stem in place.

To see all of our work on the bulkheads check out our time lapse video...cool camera Alan! A picture was taken every 2.5 minutes.

Wednesday, December 27, 2006

Thanks Duckworks!

A big thanks to Duckworks boat builders supply for donating us a 3-gallon epoxy kit to help us finish our boats. Chuck-the-Duck of Duckworks is a fellow Watertriber who finished the Everglades Challenge in 2006. We are very glad to have such strong support from fellow challengers! Be sure to check out the Duckworks website. Look out for more updates in the next few days. Oh, and Merry Christmas everyone!

Outrigger Gluefest

Yesterday we walked into the warehouse and admired the results of our hard work. Two canoe hulls without tops or bottoms laid in front of us, well on their way to completion. So did a pile of unfinished outriggers (amas) that still needed a ton of work before we could even begin the final shaping. Since we only had a few hours to spare (this was the day after Christmas, mind you,) we decided to try and laminate the last set of foam sheets onto the outriggers and call it a day. By carefully cutting up the last of the scrap 3" foam remaining from the previous outrigger work, we managed to add enough foam to create the desired contour - without using any of the 1" foam we had already purchased. This stuff is expensive - the 3" foam costs about $43 a sheet, while 1" costs about $17.


To get the desired 1" of foam we needed on either side of the existing foam-over-plywood outriggers, we ripped the scrap foam on the table saw. This was fast and effective, leaving us with straight 'planks' of foam that we could easily glue in place. The only downside to this kind of cutting is the ultrafine, static-generating pink dust that can easily make a room filling cloud. It sticks in your body hair and eyelashes. We taped cardboard around the legs of our saw and rigged a shop-vac as a dust collector. Otherwise, the dust that coated the table saw controls would have coated the room...


With more polyurethane (off brand Gorilla) glue, we adhered these last sections. Each side of the outriggers got another 4 foam segments. With plenty of masking tape and weight, we laid up one side and went to lunch. After consuming about a pound and a half of tuna, a jar of pickle relish, a small box of alfalfa sprouts, and four fresh sandwich rolls ($9), we flipped them over and glued the other side. Here's one last shot of the drying amas...

With luck we'll begin shaping before the week is out! Thanks for watching us!

Matt Hazard

Saturday, December 23, 2006

Holy Hull: Part Deux

Today Matt, Chris, and I met at the shop to knock out the bulkhead location and cutouts for hull number 2. It took us a little while to get everything aligned and proper, but we got it all done in a few hours. Now that the bulkheads and side panels are complete, the next step, once Alan gets back, is to epoxy the bulkheads in place and then start working on the decks and bottoms. These will be custom made to fit in place, matching the shape of the boat as built, not to the plans. This will account for any imperfections and give each boat its own special character. Speaking of which, hull number one has been our testbed so far - it's always been the first to get the next step completed. I'm not sure, but I expect that number 2 will be lighter and straighter, since we'll have worked out most of the kinks on the first one.

Holy Hull!! (work day 3)

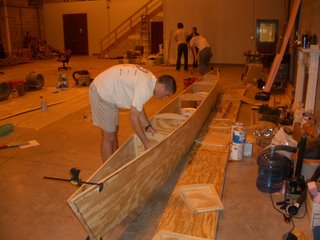
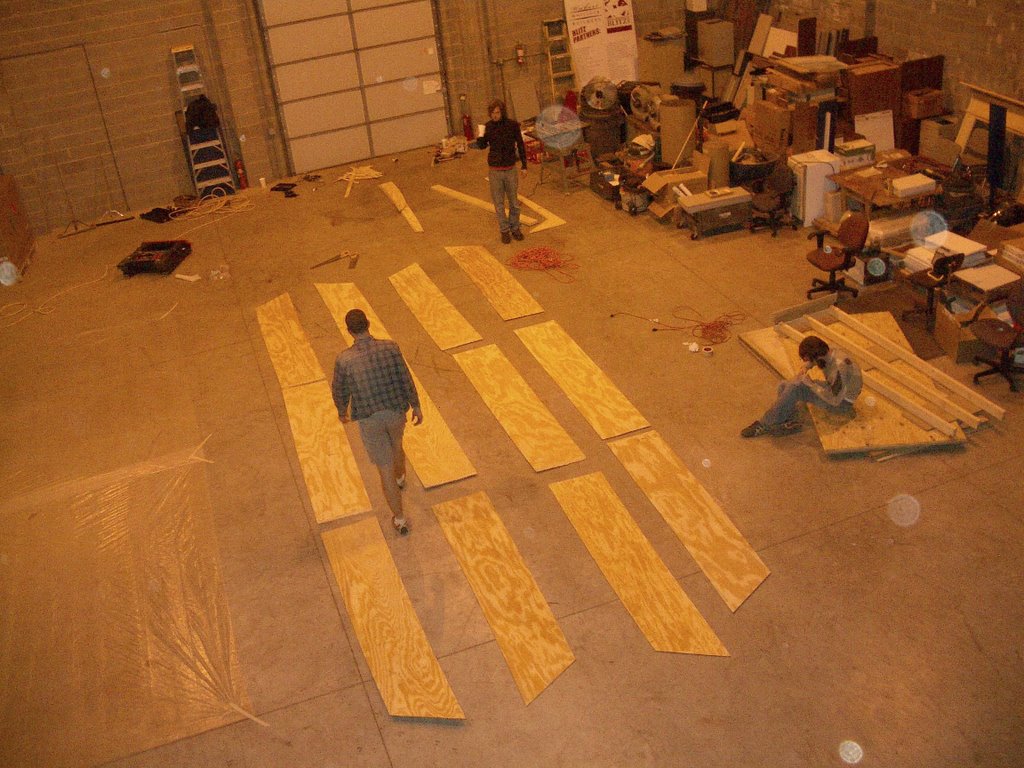
Third day of work and we have one hull framed up and looking sharp. She sure is beautiful and this sight made the whole day of work well worth it. Here is the day's progress report. As of 2am this morning there is no mistaking....its a boat!


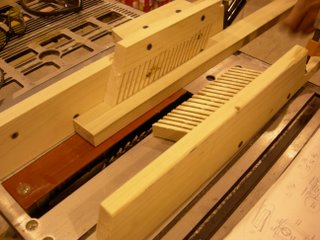
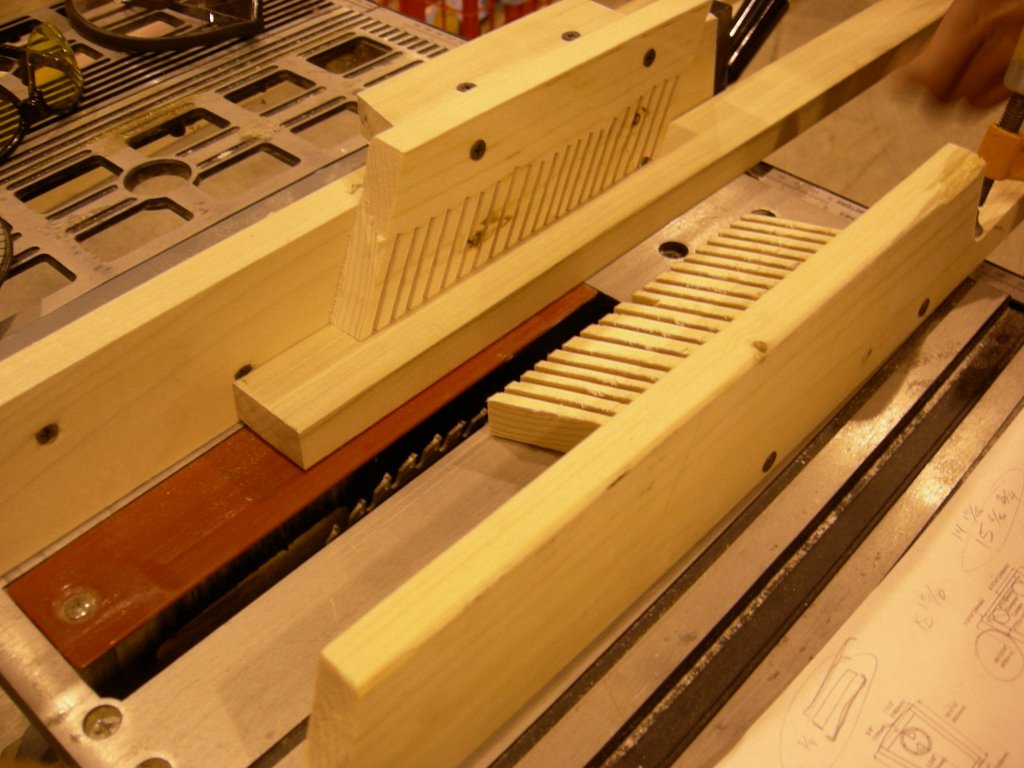
Work began this morning with chines and gunwales that had cured over night. We needed to rip them to the correct dimensions and build a feather board jig for the table saw, in order to do this accurately.


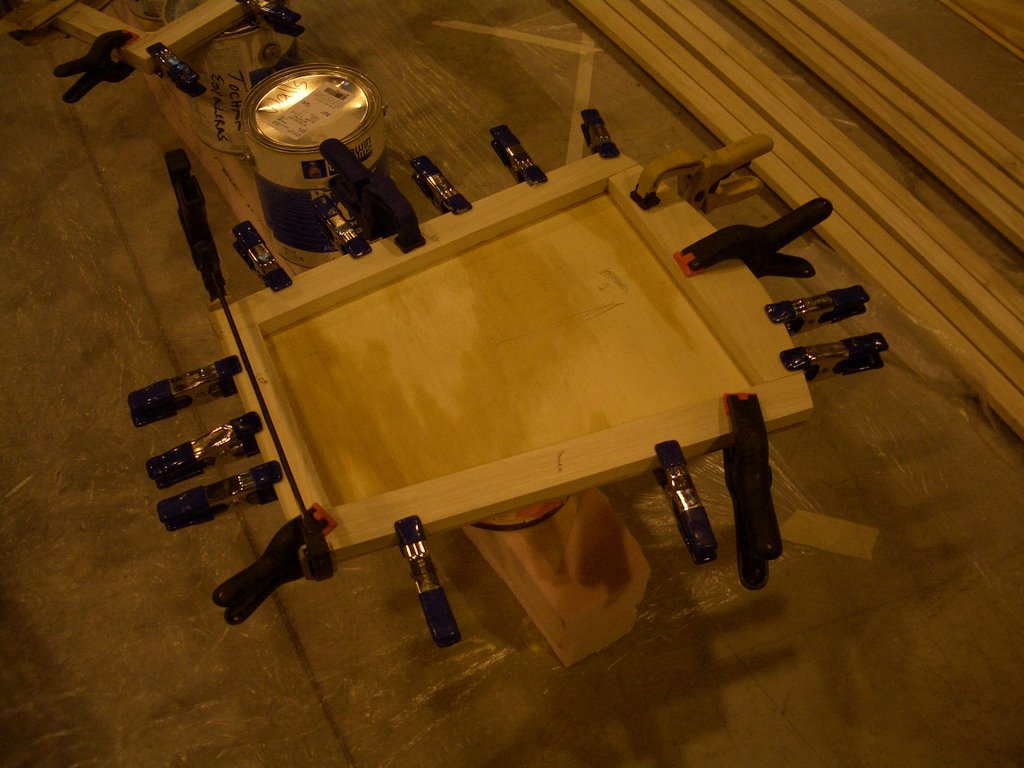
With the chines and gunwales cut to the proper dimensions, we used a spacing jig to set them onto the side panels and screwed them into place. Then we removed the screws to apply epoxy and reassembled to a perfect fit.


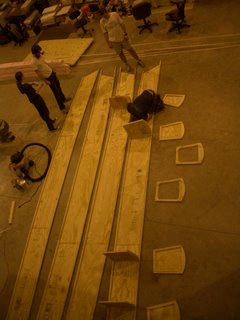
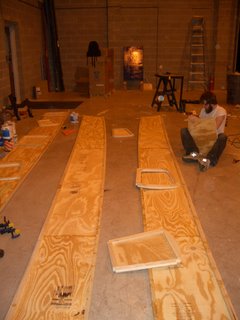
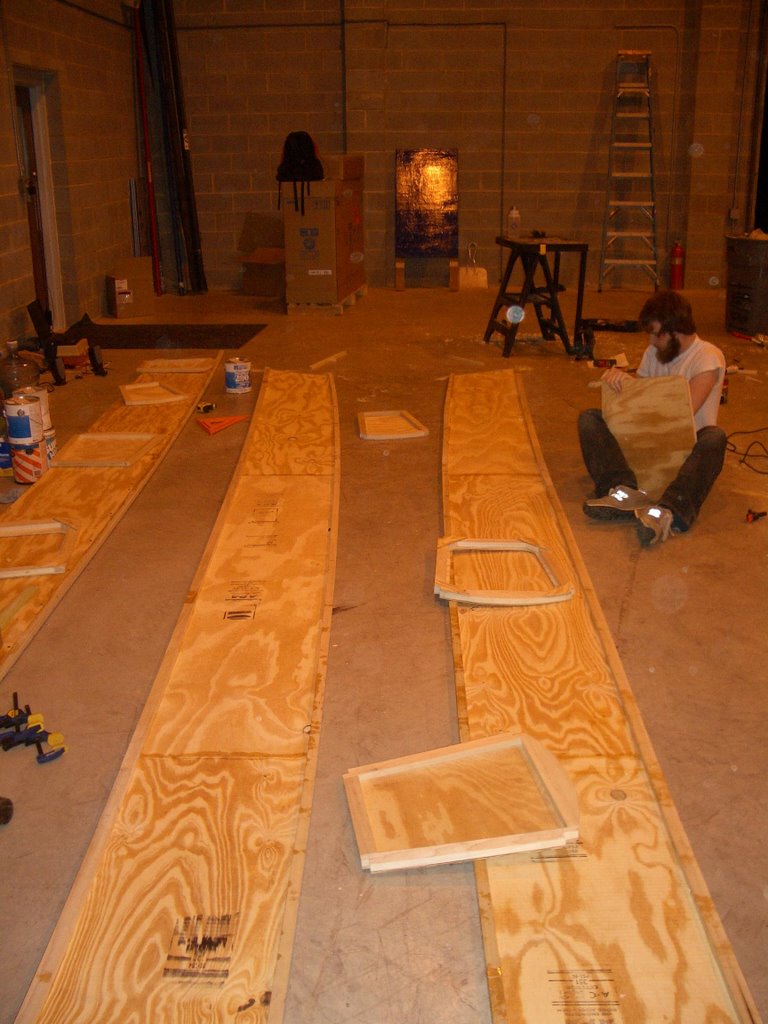
Here are all four side panels with gunwales and chines curing. We are also starting to think about the final bulkhead placement and beveling at this point.


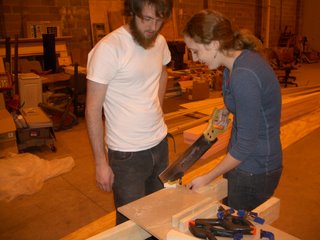
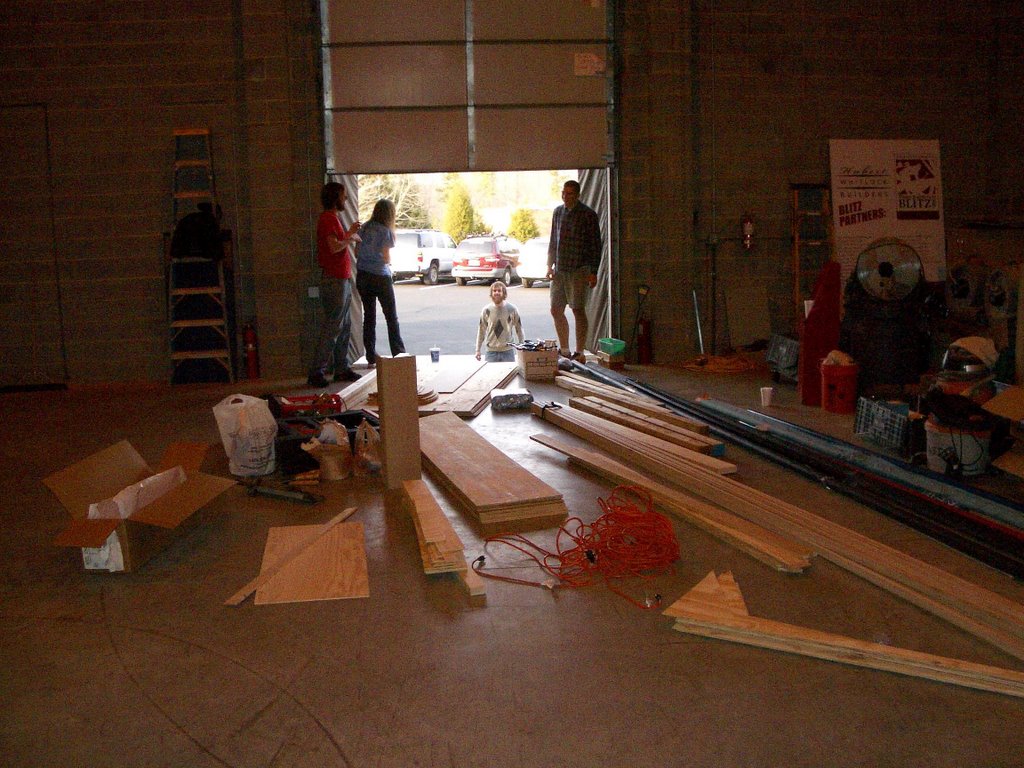
Much thanks to Katherine, Matt and Chris's sister who spent most of the day with us in the shop volunteering to help us work. She proved herself to be very handy with a saw. She also managed to keep us on task, reminding us of what we needed to get done.


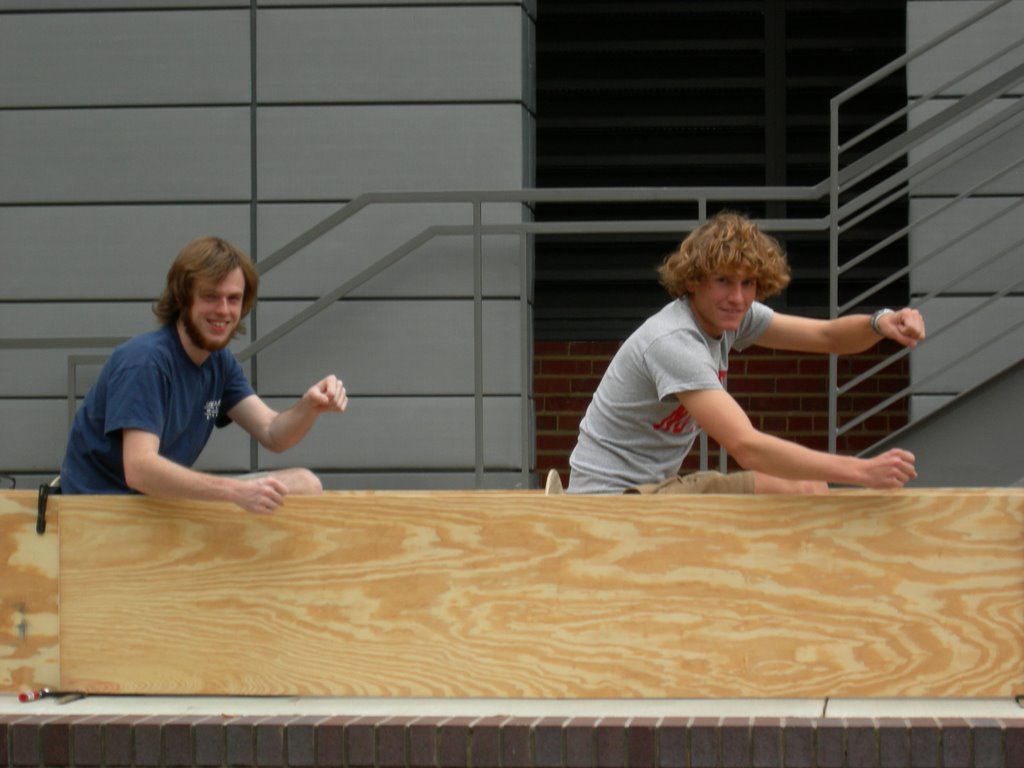
We decided to have one last look at the bulkhead placement and with Mike as the model, we settled on a bulkhead spacing that maximized leg room without much deviation from the plans. The boat is pretty deep; we'll need tallish seats to clear the deck. In this picture, Mike is sitting on a pair of paint cans and a short stack of bricks.


After adding some plywood gussets to the center bulkheads, we planed, sanded, and marked up the bulkheads and started notching them for their final position in the hull.


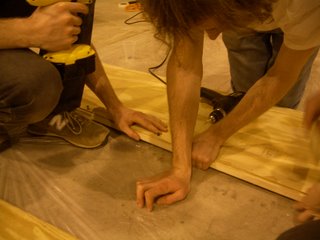
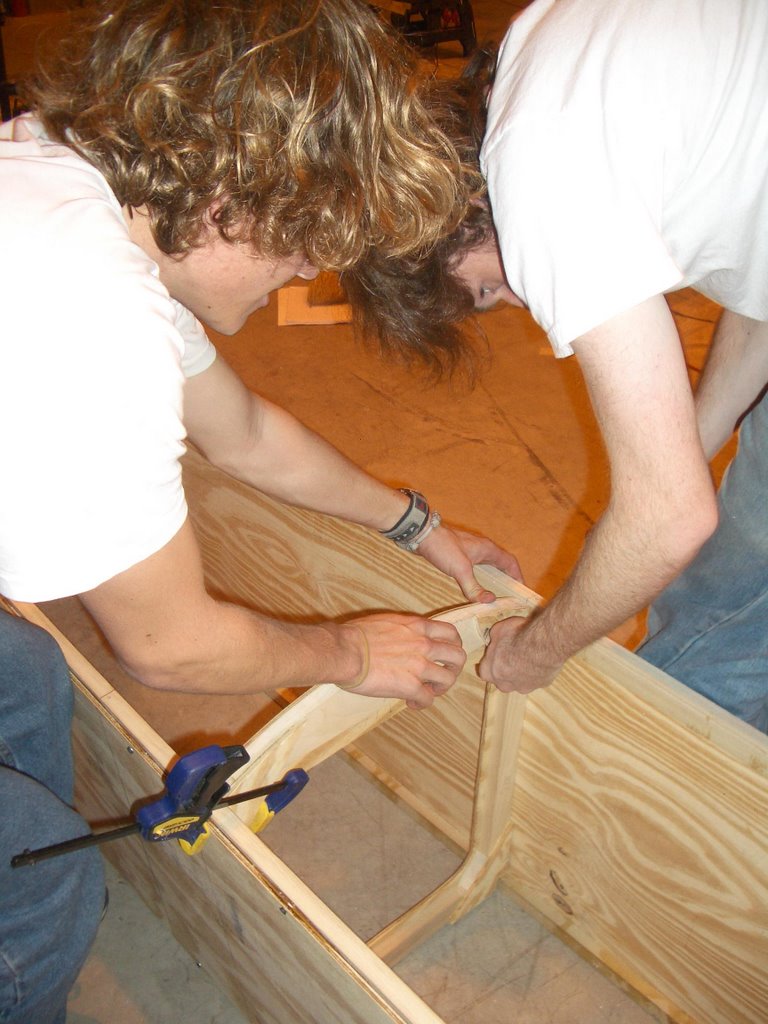
The bulkheads fit without much difficulty and it started getting exciting. Here, Chris is making some fine adjustments to a bulkhead notch for a perfect fit.


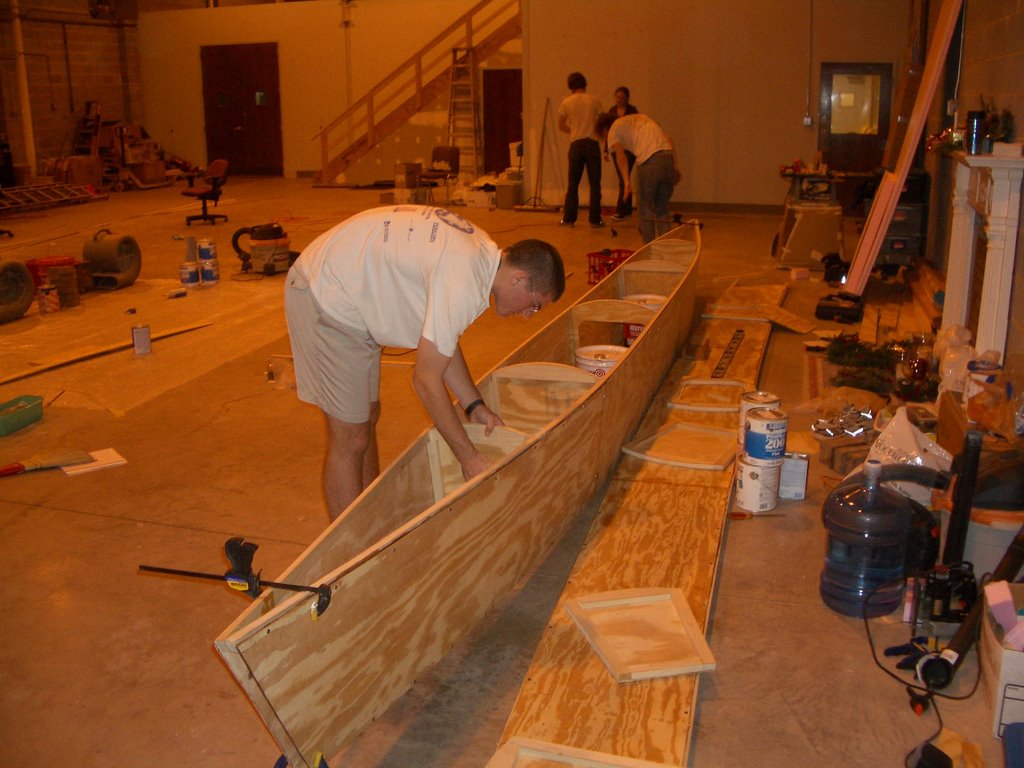
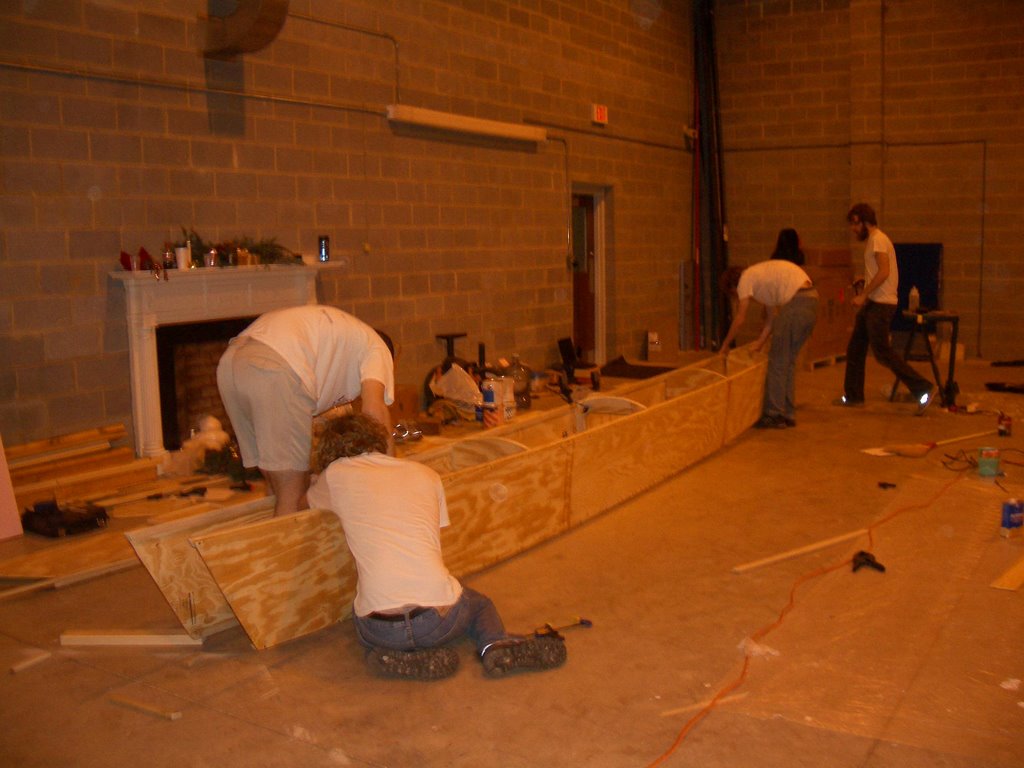
With all the notches finished, the sides went together very quickly. We used temporary wood screws with large washers (to protect the side panel surface) to attach the bulkheads to the side panels for a dry fit of the hull before epoxying.


The bulkheads fit right into place. YES!!!


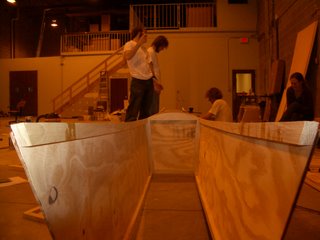
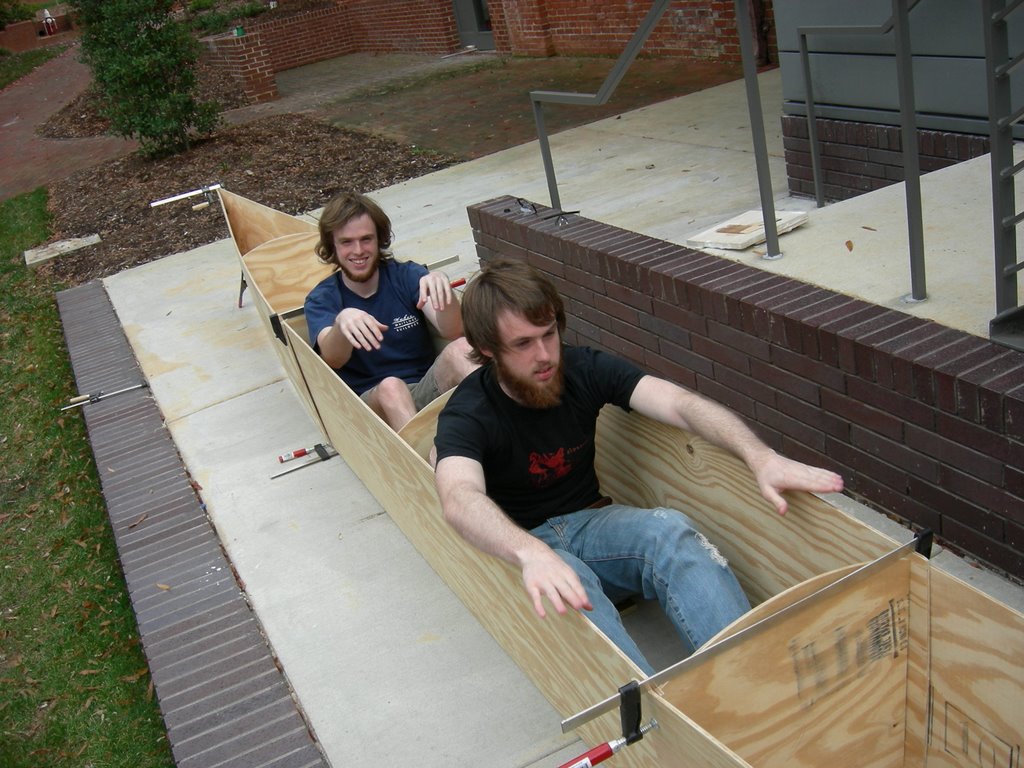
Here are a couple of pictures during the bulkhead/side-panel dry fitting.


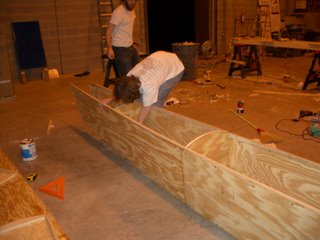
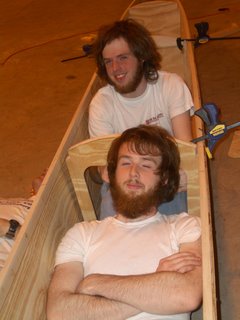
Hmm, how is the fit Matt? We left 54 inches of space between bulkheads for each cockpit. This gives the occupant enough room for to recline into a very comfortable position. I think Chris is asleep. shhhh


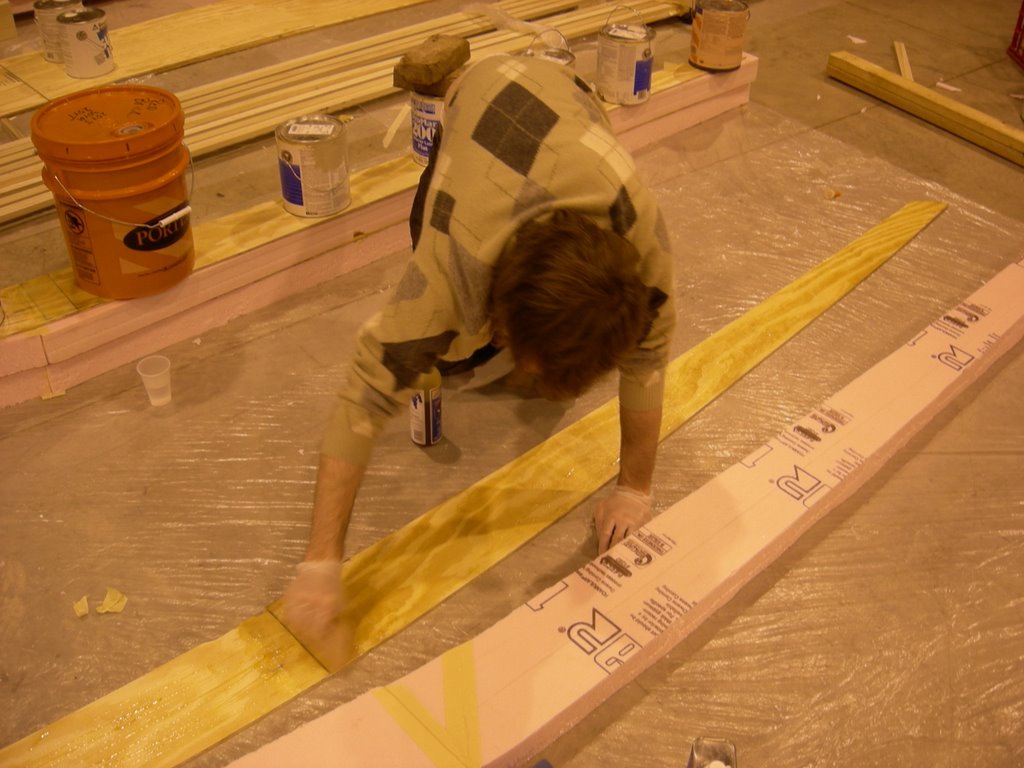
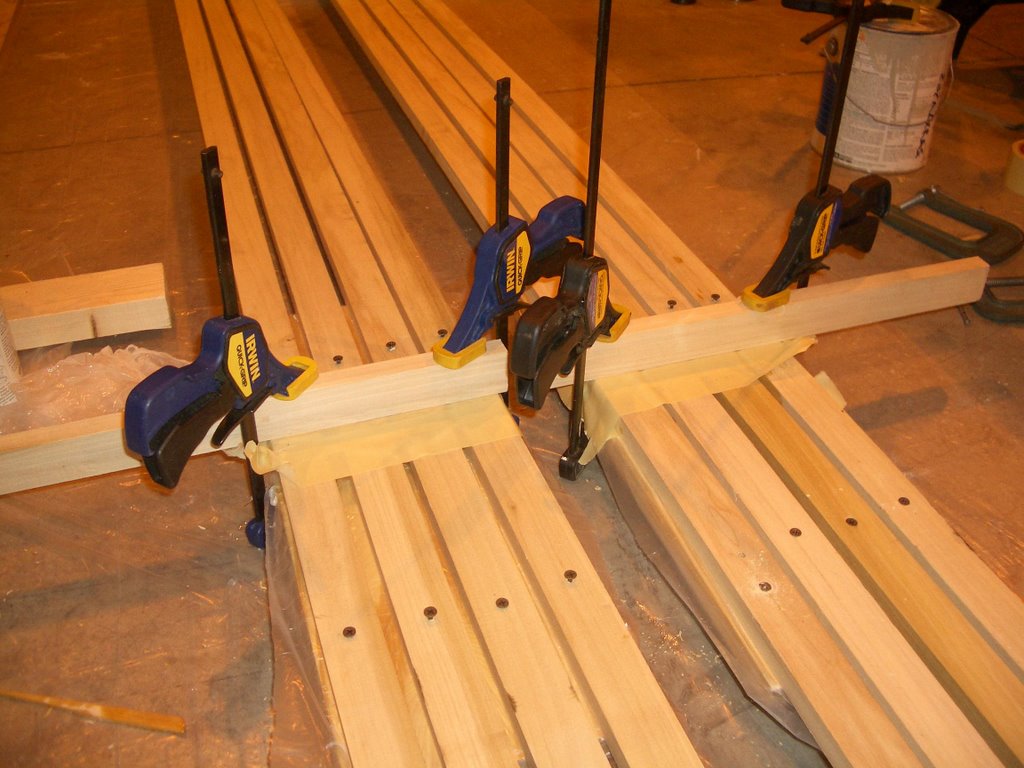
We also finished laminating all of the three inch foam onto the ama frames. We still have to laminate a one inch layer to the outside to get the full width we want. Here, Chris is spreading the polyurethane glue onto the ama before laminating it to the foam.


Mike and Matt work on weighing down the ama to cure under compression. Since the polyurethane glue is an expanding type, the pieces have to be well clamped to avoid gappy joints.


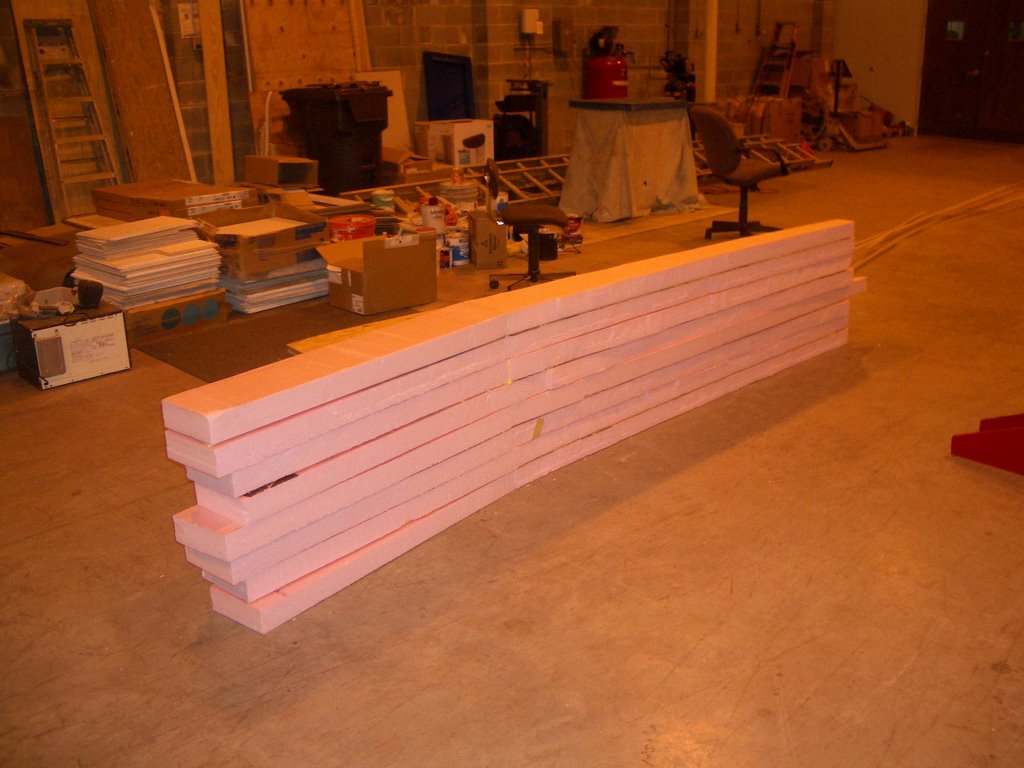
Our stack of finished amas with foam attached. These still need their outer layer, and final shaping into a circular cross-section. The whole team is planning to meet back up after Christmas. Until then, Matt, Chris, and Mike will be working more on the second hull and shaping the amas out of the foam. I will be going back to Chapel Hill for some family time.

Friday, December 22, 2006

Back to work (work day 2)

Back from a long day of work at the warehouse today (Thursday). We got to work laying up the rest of the side panels so they could cure during the day and then Chris and Mike went in search of some foam to use for the ama construction. Meanwhile, Matt and I started work on the gunwales and chines scarfing and gluing long hardwood boards together that will make up the stringers.


Here are the gunwales and chines curing under compression. The joints overlap at a shallow angle similar to the scarf joints used in the side panels to maximize the glued surface area and balance the normal and shear loads in the joint.


Trimming the excess fiberglass from the edges of the ama panels. These joints are strong!


With Mike and Chris back with the foam, we started working on cutting strips to laminate to the plywood panels to make up the structure of the amas that will later be shaped to the final ama shape and then fiberglassed. We used expanding polyurethane glue to laminate the foam to the plywood, it for the application.


While the amas were drying we got to work assembling the bulkhead structure. Each plywood bulkhead has a hardwood perimeter around it that aids in attaching the sides, bottom and deck. Here is the number 2 bulkhead with the hardwood glued in place. The end of day two we managed to finish all of the bulkheads, all of the chines and gunwales and all of the side panels. A very long day but very rewarding.

Some real progress

The team and vehicles are relocated for now in Charlotte, NC and we have set up camp in the warehouse attached to Hubert Whitlock Builders, a local contractor owned by Chris and Matt's family. The large heated space is ideal and much progress has been made. Here we are on Wednesday after unloading the trailer exited to get some real work done. Read on!


The view from above in the new workspace showing our side panels laid out for labeling as we prepare to make that scarf joints and join the side panel pieces together. It was a big help to be able to spread everything out on the floor and organize all of our parts.


The finished scarf joints ready for joining. The scarf joint making jig worked flawlessly after the 5th or 6th try on some scrap plywood getting everything lined up juuuuust right. The joint was made with thickend epoxy and compressed with weights.


At the end of day one we have half of the scarf joints laid up and curing and our four ama sections laid up on the far left one on top of the other. The ama pieces were joined with butt joints and sandwiched between a layer of 4 inch wide strip of 8oz fiberglass cut on the bias top and bottom. We were a little short on heavy things so everything in the room turned into a weight to help compress the joints. All in all, a good first day.

Sunday, December 17, 2006

Back to Work

Yesterday the team spent some quality time in the woodshop on campus getting the rest of our pieces cut out before the move to Charlotte, NC where we will be finishing the boats over our winter break. Chris and the shop bot were put to work getting the ama frames cut out and we also stared working on the crossbeams beginning with a test section. Here, Matt, Chris and Mike pose with the our pile of boat parts. Below are some pictures of the days progress.


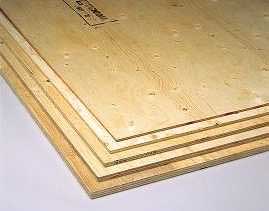
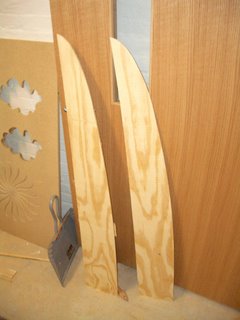
Above are the front ama sections that will be joined with the rear sections and laminated in between thick blue foam and shaped to the final ama profile.

This jig was made to cut the scarf joints into the hull side panels that require a very low angle cut for making the joint.

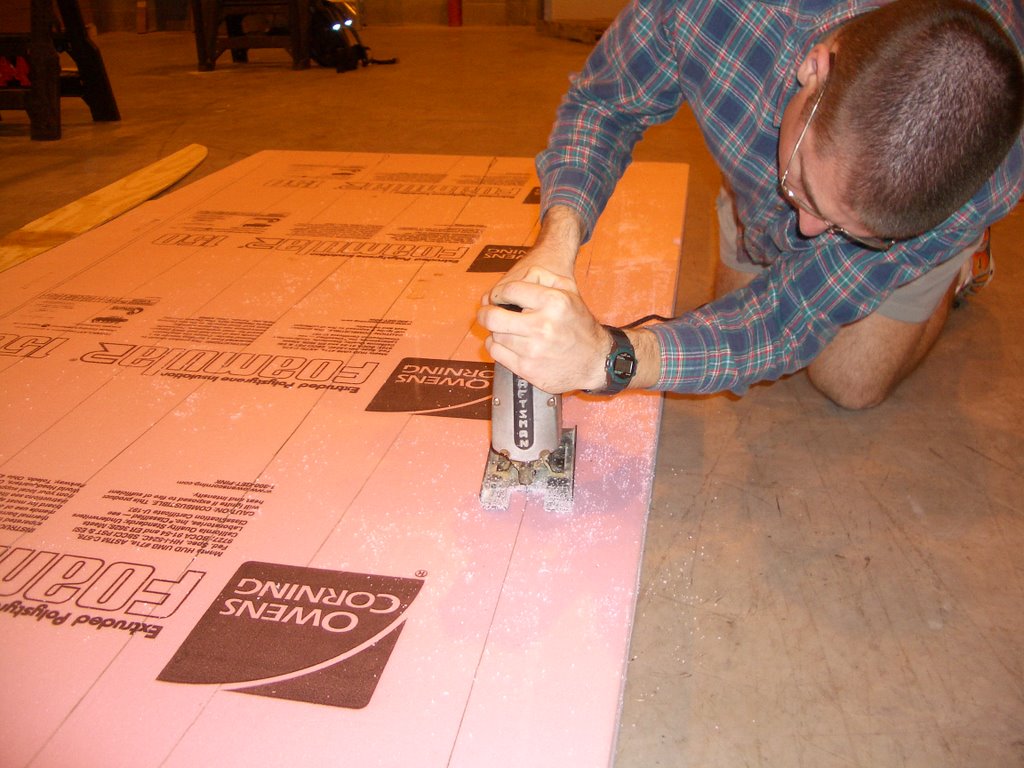
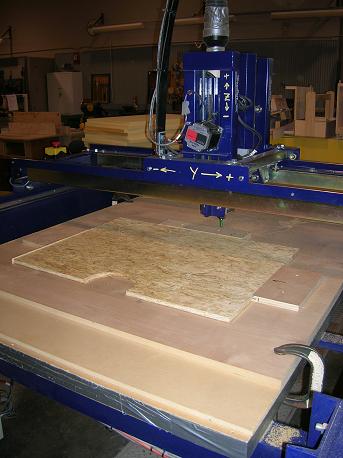
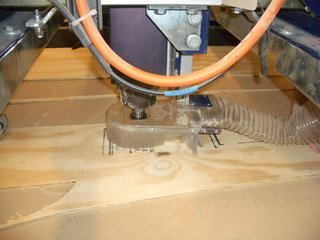
Here is the shop bot in action cutting out the ama panels. We were able to cut all of the panels for all 4 amas out of one sheet of plywood!

Wednesday, December 13, 2006

Fiberglass

Last week Matt and I took a quick but prosperous road trip to High Point to pick up some fiberglass. After hunting around Raleigh and the internet we finally found Thayercraft Industries which stocked what we wanted at the right price.


Now the only major things left to buy are Epoxy, masts, blue foam, and all of our required equipment; we hope to get things taken care of before we break for the semester. Speaking of the break, the current plan is to move everything to Charlotte and go on a 2-3 week building blitz so the majority of the canoes are done before school starts up again. Look for more updates in the coming weeks, we hope to have great progress.

Wednesday, November 15, 2006

Big Canoes

Yesterday afternoon Alan, Matt, and I knocked out the last of the side hull sections on the Shop-Bot. By that time Chris was out of class, so we decided to mock up a hull with clamps, here are some of the pictures.

They look ready to take on the Manatees.


I can imagine these looks at the end of 300 miles.

One of the design school shop workers knows a thing or two about homebuilt boats, and he asked us how long the race was, we responded "300 Miles" and he said that the sea wasn't that deep. The next picture puts his words into a visual form.

After we wrapped up at the design shop the four of us went on a hunt for some fiberglass and bronze nails. Turns out that the nails are only available online, and the fiberglass would cost us one son and one daughter. Unfortunately we don't have any sons or daughters, so we couldn't get any fiberglass, but we're working on a deal with that supplier.

Sunday, November 12, 2006

Tiny Canoes

We had hoped to have the bulkheads cut by today but the ShopBot having recently been setup for use and not properly calibrated yet and the woodshop lab hours being limited on the weekend, we decided to take our side panel and bulkhead CAD files for the canoes and have some fun in the laser cutting lab. Here is the result of our days work. We built 4 models so that we could each put one together.
Cutting out the bulkheads and side panels on the laser cutter and assembling the boats in miniature was a really good exercise for the overall construction of the boats. With some more work tomorrow, we hope to have the ShopBot up and running and get some full sized boat pieces cut out. Below are some more picture of the models.


Thursday, November 09, 2006

We've Got Wood! ... for building boats

That's right, we are now committed to our three board canoes. We picked up the lumber today and have begun work on rescaling the plans. Capitol City Lumber was very generous and offered us the wood at their highest discount. We opted for Exterior A-C plywood because we feel that the extra cost does not outweigh the benefit for a canoe that we do not plan to mount a motor on. But mostly because marine plywood (Okume or the like) is simply out of our price range.

We will use a shop-bot that we have access to at school to cut out our bulkheads and side panels. That should make quick and accurate work of the “curvy pieces” so that we can begin assembly. The shop-bot shown here is basically a 3-axis router that can cut 4x8 sheets of wood to exact shapes based on a CAD file. Here is a picture of one.


We plan to modify the deck to more fully enclose the canoe and allow for cockpits to be cut so that we can outfit the boat with spray-skirts. We will also be designing our mast step and outrigger crossbeam mounting cradles into the hull as well as all the necessary storage compartments, hatches and closed cell foam buoyancy compartments.


We hope to begin cutting, shaping, and assembling this weekend so stay tuned for pictures and information.

Tuesday, October 17, 2006

Canoe building plans

While researching boats for possible use in the Everglades Challenge, we came across the Wa'apa and were interested because of its simplistic and efficient construction.Gary Dierking of Outrigger Sailing Canoes http://homepages.paradise.net.nz/garyd/ graciously supplied us with a copy of construction plans for this craft and we are looking into the materials list and design to see if this is the boat for us. Thanks a lot Gary.
There are many other interesting and easy to build sailing canoes on the outrigger Sailing Canoes website so please take a look.

The Wa'apa is a three board canoe that is very simple to built. A three board canoe is so named because that is how it is built. There are a couple of designs for this boat including a shunting version and a tacking version. It is also possible to build the boat such that it can be broken into 8 foot sections that bolt together at bulkheads.

We would plan to build two identical boats that would have the capability to be sailed or paddled individually or connected and sailed together in a catamaran configuration for use in our 4 man team entry in the Everglades Challenge in 2007.

Canoe Sailing on Jordan Lake

The Team rented a 16 foot canoe from the university last weekend to try our hand at canoe sailing. We outfitted the canoe with my windsurfer mast and a 5.5 meter sail as well as a sunfish daggerbaord and two inflatable bow air bags for a kayak that we used as outriggers.
To the lake we went. We were able to all pile in which was a good test of a boat loaded with gear even if this wasnt the boat we would use.

There was a steady 6 knots with gusts to 8-10 and we putted across the lake at about 3knots with a top speed of about 4. Granted, at this speed paddling is far more efficent and faster, we were interested in seeing how far we could get on sail power alone. It was a fun expereiment and for 8 dollars for the canoe it was unanimously agreed to be in the college student budget.


The pictures don't tell the whole story, so here is some video.